No yeast. No rising time. No waiting around for two hours wondering if the dough is doing anything. These cinnamon rolls use a quick biscuit-style dough that goes from bowl to oven in about 15 minutes — and you’re eating warm, gooey cinnamon rolls in under an hour.
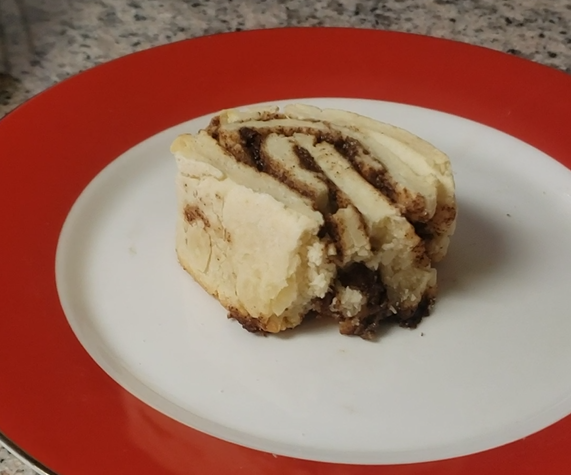
We actually made these in our kitchen and filmed the whole process. They’re soft, tender, and genuinely delicious.
## Why This Recipe Is Celiac-Safe- Certified ingredients — All critical ingredients require GFCO certification (<10 ppm) or equivalent
- Cross-contact prevention — Instructions for safe pan and surface preparation
- No yeast needed — Eliminates a common source of celiac uncertainty (some yeasts are grown on barley)
- Tested by us — We made these, filmed it, and ate every one
Safety Note: If you share your kitchen with gluten-containing products, ensure your work surface, rolling pin, and baking pan are thoroughly cleaned or dedicated to celiac-safe cooking. See our kitchen setup and cross-contamination prevention guide for a full rundown.
Recipe Overview
| Prep Time | Cook Time | Total Time | Yield |
|---|---|---|---|
| 15 minutes | 25 minutes | 40 minutes | 8 servings |
Difficulty: Medium
Ingredients
Ingredient Certification Requirements
Verify that ALL ingredients are certified gluten-free before starting. The FDA’s 20 ppm standard may not protect all people with celiac disease. Choose GFCO-certified products (<10 ppm) when available.
Dough — Dry Ingredients
- 2 cups certified gluten-free cup-for-cup flour — (must contain xanthan gum)
- Recommended: Bob’s Red Mill 1-to-1 (buy on Amazon) — read our full Bob’s Red Mill review for details on celiac safety
- ¼ cup tapioca flour — Helps with stretch and chew; also used for dusting
- 2 tablespoons potato starch — Adds lightness and moisture
- 2½ teaspoons baking powder — Clabber Girl or Rumford are labeled gluten-free
- ½ teaspoon salt — Plain salt is naturally celiac-safe
- 2 tablespoons sugar
Dough — Wet Ingredients
- ¾ cup milk — (or half-and-half for richer rolls)
- 1 large egg, room temperature
- ¼ cup melted butter, slightly cooled
- 1 teaspoon pure vanilla extract (optional)
Cinnamon Butter Filling
- 3 tablespoons very soft butter
- ⅓ cup brown sugar
- 1 tablespoon ground cinnamon — Simply Organic is GFCO certified
- Small pinch of salt
Optional Vanilla Icing
- ½ cup powdered sugar
- 1–2 tablespoons milk or cream
- Splash of vanilla
Instructions
Step 1: Preheat and Prep the Pan
Heat your oven to 375°F (190°C). Grease an 8×8-inch square pan or 9-inch round pan generously with butter or oil. Metal or aluminum pans work best — glass or ceramic pans may need 3–5 extra minutes of bake time.
Optional: Line the bottom with parchment paper for easy lift-out.
Step 2: Mix the Dry Ingredients
In a large, clean mixing bowl, whisk together:
- Gluten-free cup-for-cup flour
- Tapioca flour
- Potato starch
- Baking powder
- Salt
- Sugar
Break up any lumps. Set aside.
Step 3: Combine Wet Ingredients
In a separate bowl, whisk together:
- Milk (or half-and-half)
- Egg
- Melted butter (make sure it’s not hot — it will cook the egg)
- Vanilla extract (if using)
Pour the wet ingredients into the dry and stir until a soft, slightly sticky dough forms.
Dough too dry? Add 1–2 tablespoons of milk. Too sticky? Dust lightly with tapioca flour (not GF flour — tapioca won’t make it tough).
Step 4: Roll Out the Dough
Place the dough between two sheets of parchment paper or a cutting board covered with gluten free flour. Roll into a 10×12-inch rectangle, about ¼ inch thick.
The parchment makes this much easier — no extra flour needed, no sticking, and no gluten cross-contact from your work surface.
Step 5: Add the Cinnamon Filling
Mix together the soft butter, brown sugar, cinnamon, and pinch of salt until smooth. Spread the filling evenly over the rolled-out dough, leaving about a ½-inch border along one long edge.
Step 6: Roll and Slice
Starting from the long side (opposite the bare border), roll the dough tightly into a log. Use the parchment paper underneath to help guide the roll.
Slice the log into 8 rolls, each about 1 to 1¼ inches thick.
Tips for clean cuts:
- Dental floss works better than a knife — slide it under the log, cross the ends over the top, and pull through
- A sharp knife works too — use a gentle sawing motion, don’t press straight down
- If the dough is very soft, chill the log in the fridge for 10 minutes before slicing
Step 7: Arrange and Bake
Place the rolls cut-side up in the prepared pan. They can be snug — tighter spacing gives gooey, soft sides. More space between rolls gives crisper edges.
Bake for 20–25 minutes, until puffed and lightly golden on top.
Step 8: Ice and Serve (optional)
Let the rolls rest for 5 minutes out of the oven. While they’re still warm, whisk together the powdered sugar, milk, and vanilla for the icing, and drizzle it over the top.
Serve warm. These are best eaten the same day.
Storage
Same day: Best fresh and warm. Keep loosely covered at room temperature.
Next day: Reheat individual rolls in the microwave for 15–20 seconds with a damp paper towel over top. This restores the soft texture.
Freezing: Cool completely, wrap individually in plastic wrap, then foil. Freeze for up to 1 month. Thaw at room temperature and reheat with the damp paper towel method.
Storage Note: If you share your kitchen with gluten-containing products, store your celiac-safe baked goods in a separate, clearly labeled container to prevent cross-contact.
Substitutions
Dairy-Free Version
- Replace butter in dough with neutral oil or Miyoko’s vegan butter
- Replace butter in filling with Miyoko’s or Earth Balance (must be very soft)
- Use plant-based milk throughout
- Make icing with plant-based milk or cream
Egg-Free Version
Replace the egg with one “flax egg”:
- Combine 1 tablespoon ground flaxseed + 3 tablespoons water
- Let sit 5 minutes until thickened
- Use as directed
Note: The dough may be slightly less stretchy. Handle gently when rolling.
Troubleshooting
Rolls are dense or flat
- Cause: Baking powder may be expired, or dough was overworked
- Fix: Test baking powder freshness (it should fizz in hot water); handle dough gently
Filling leaks out during baking
- Cause: Rolls weren’t tight enough, or filling was too warm
- Fix: Roll tighter; make sure butter in filling is soft but not melted
Dough cracks when rolling
- Cause: Too dry
- Fix: Add 1–2 tablespoons milk and knead briefly; roll between parchment paper
Rolls are doughy in the center
- Cause: Underbaked or pan too large (rolls too spread out)
- Fix: Bake until golden; use the recommended pan size so rolls support each other
Icing is too thick or too thin
- Too thick: Add milk ½ teaspoon at a time
- Too thin: Add powdered sugar 1 tablespoon at a time
Nutrition Information (per serving)
| Calories | Protein | Carbs | Fat | Fiber | Sugar |
|---|---|---|---|---|---|
| 245 | 3g | 38g | 9g | 1g | 18g |
Nutrition information is approximate and includes icing. Values may vary based on specific ingredients used.
We made this recipe in our kitchen and filmed the process. Always verify current ingredient formulations, as manufacturers change products without notice. When in doubt, contact the manufacturer directly about their celiac-safe protocols.
Looking for more celiac-safe baking? Try our banana bread for a quick loaf or our fluffy pancakes for a weekend breakfast.
Sources
- FDA. “Questions and Answers: Gluten-Free Food Labeling Final Rule.” August 2013.
- Gluten-Free Certification Organization. “GFCO Certification Standards.” Accessed 2026.
- Celiac Disease Foundation. “Sources of Gluten.” Accessed 2026.